A few years ago, the Stichting Handboekbinden posted the availability in sheets of Johann Denninger's De Bradelbinding (The Bradel Binding), also here. The New Bookbinder (1996) had published what I consider an abridged version with some history of the structure and something about this Bradel ... Like the article, this book started off with a lot of "according to" history, before going into the step-by-step instructions for what ends up as a hybrid historical/old school Pappband/Edelpappband, the latter so called because of the corner and head/tail reinforcements in parchment or leather, something that was first described in the literature around 1905. I describe the history of the Pappband structure, including a review of the literature and step-by-step instructions for the Ur-form in a 3-post series starting here.
But, back to Denninger ... I rarely follow instructions from a manual when binding it, but decided to in this case. The text is in Dutch, but I could get the gist of most from the illustration and my German/English Denglish. For those parts I couldn't figure out, I took screen grabs from the PDF available at the link above, then using Google Lens to translate the image. Then copy and paste into a Word ... document.
%20sm.jpg) |
| A template ensures that all the sewing holes line up ... |
%20sm.jpg) |
| I sewed on three untwisted and frayed out cords, so like tapes, but ... |
%20sm.jpg) |
| With the sewing done, the endsheet section was narrowly tipped-on the adjacent signature, then the spine was glued up nice and square. |
%20sm.jpg) |
| After rounding and backing to 45° at the shoulder with my "kashtoir", I lined the spine with muslin between the sewing stations. Then, I used my fray shield to clean up and untwist ... the strands of the cords so that they were nice and clean ... |
%20sm.jpg) |
| Next, I applied paste along the spine edge of the waste-sheet and to the cord, neatly fanning them out and smoothing with a folder so they weren't lumpy ... (Read image from right to left) |
%20sm.jpg) |
| Denninger then suggested a "gebrochener Rücken", scroll down here, the quintessential hallmark of this style, or this little piece that was the width of the spine + 2x the slope of the shoulder. I had only seen this in connection with the "Danish millimeter" binding, but gave it a try. The edges were pared, then the over-long piece was adhered only at the shoulder. Then, the boards were attached to the waste-sheet adjacent to the shoulder. Glue should only go just beyond the fanned-out cords. |
%20sm.jpg) |
| In keeping with the style, I made dainty little leather corners/tips. |
%20sm.jpg) |
| The same was done with the corners. They will be "invisible" when the cover is viewed board-on, and almost invisible on the turn-ins. |
%20sm.jpg) |
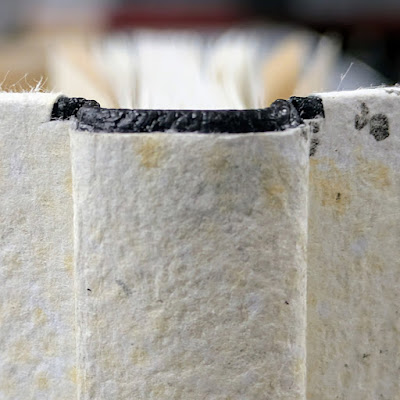
| Here, head [and tail] after covering. After covering and making the turn-ins, I trimmed out the verso of the board, so it was all neat and tidy. |
%20sm.jpg) |
| And the corners from the inside showing the turn-in. |
%20sm.jpg) |
| Finally, the overall. I made the oil-marbled paper in 2019. It was my introduction to marbling in 1984, and 2019 was the first time in over 30 years ... The title is a laser printed recessed label with an edge, something I learned from Bill Minter when I worked for him a l.o.n.g. time ago. I describe how to here. |
All-in-all, an interesting exercise and fun excuse to get back into binding after an extended absence.
This also ties in well with something I'm working on regarding the evolution of the Pappband/Bradel into the Edelppband, and now this thing called a Sandgren Binding. Nomenclature is important, but gets VERY messy with multiple languages and "creation myths".

%20sm.jpg)
%20sm.jpg)
%20sm.jpg)
No comments:
Post a Comment