That there was once the idea that books were functional items, not fetishized objects that should take as long as possible to make and should include many unnecessary features.
That "good enough" is sometimes an appropriate, and even a noble goal, not an abomination.
Karen Hanmer (4/26/2012)
Known as broschuren and steifbroschuren in German, these brochures, pamphlets, and other related bindings have long been a
part of the German bookbinding tradition. These can range from single
section pamphlets with simple wrappers to adhesive bound or sewn
textblocks in wrappers, to hard cover variants. In all cases the common
thread is providing the texts with a simple yet functional binding that
may or may not be intended to be permanent.
In my
previous post I provided some images of historical examples of this structure from Syracuse University Library's von Ranke collection. In this post I will provide a more tutorial-like description (a more formal article is in preparation) of some of the variations that are common.
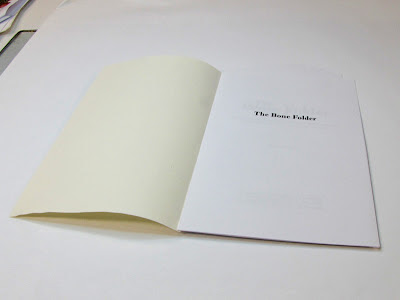
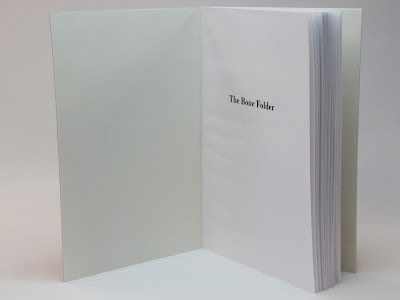
The textblock I have used is my translation of Collin's
Der Pressbengel available as
The Bone Folder in a pdf version laid out in signatures. See the link in the left side bar to download. As was, and remains, common to most books, the letter-sized paper I used has the grain running perpendicular to the spine resulting in some cockling of the textblock due to moisture from the adhesive used to attach the boards and covering... There, got that out of the way.
Forwarding of these is very minimal, endsheets generally a single sheet or folio that is folded/hooked around the first and last signature or a simply a tipped on folio.
Historically, sewing was generally a simple unsupported stitch (Holländern). Several books would be sewn together in stacks and then separated into the individual volumes by cutting the threads between after the pasting/gluing up of the spines. Staples were also common in lieu of sewing with thread. After being separated, the spines were repasted/glued and inserted into a folded paper wrapper. In some cases the wrapper was also pasted to the endsheet to make a slightly stiffer cover.
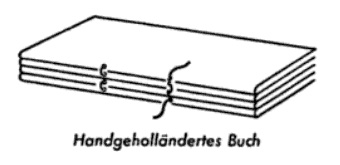 |
| Detail from Wiese's Der Bucheinband. |
In the variant with stiff boards, endpapers were identical, with a single tipped on folio also being used, especially in the 20th century. Sewing was often more robust using a linked stitch, but also tapes, slips, or recessed cords being used. After sewing, the spine was pasted/glued as before. The book could also be rounded but was not backed to save a step.
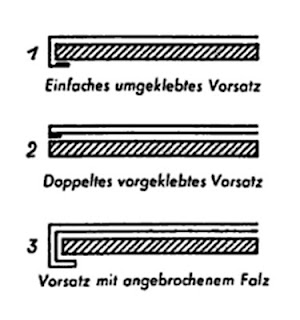 |
Detail from Wiese's Der Bucheinband.
1) Single leaf tthat is hooked around first signature and becomes the pastedown after sewing.
2) Single folio tipped onto first signature.
3) Single folio hooked around first signature. |
Next thin boards were cut to the height of the textblock, with a width that allowed for a narrow “groove” and for edge square. The top/bottom endsheets are pasted/glued out, the boards positioned and the book given a quick nip in the press. The book would then be covered with full paper, cloth on spine and paper on boards, or full cloth. Cloth would generally be thinner, and was not turned in, except occasionally at fore edge. Next, all three edges were trimmed flush unless a fore-edge square was left, in which case only top and bottom were trimmed. Finally a label could be applied.
Steps that follow will describe several variants that can be applied to sewn and adhesive bound structures using soft and stiff boards (Steifbroschuren).
Adhesive bound:
I use this style to bind text printed out from Google Books, books that arrived with spiral-type bindings, or simple substantial photocopied articles... Not beautiful but very functional.
Cut single folio endsheets to fit textblock. Precut thin cloth/muslin to height of textblock and ca 6cm wider than spine. Put endsheets on both sides of textblock and double-fan adhesive bind applying thin cloth centered on spine ensuring that it is well adhered with glue seeping through. Put in press with boards just shy of spine edge and close press tightly.
When dry, cut boards proportionate in thickness to the size of the book to the height and width of the textblock. To attach boards apply adhesive first to the outer sheet, put down cloth hinge, apply adhesive over cloth (all as if casing in) and then put down first board, setting it back from the spine by about 5 millimeters. Repeat with other side. Insert fences of thin cardstock between pastedowns and text, and put in press giving it a good hard nip.
To cover, cut cloth to cover spine and reaching onto board (or fully cover spine and both boards). Work cloth into groove ensuring good adhesion to spine, then onto remaining board. Using edged casing-in boards give quick nip, take out. If only spine was covered, leave remaining board bare or cover with a contrasting paper or cloth.
If a fore-edge square is left, trim this to the desired size before covering, cover, trim so that it is no more than a centimeter, and then turn-in.Put between boards and under weight to dry.
Trim 3 sides so as to be flush, i.e. no squares. If a fore-edge square was left, trim only at head and tail.
Apply label to spine of front board as/if desired.
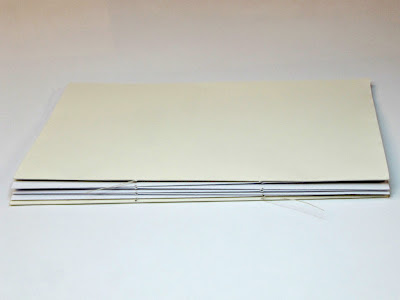
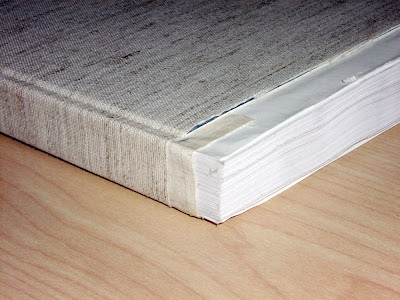 |
| Adhesive bound before trimming showing layers. |
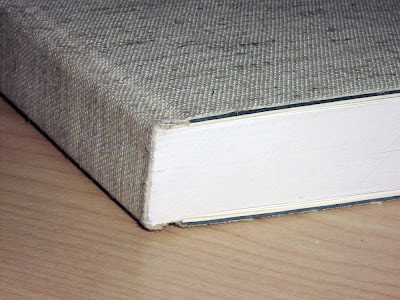 |
| Adhesive bound after trimming |
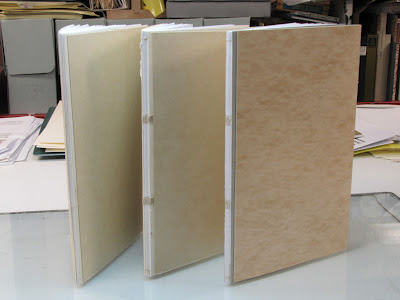
 |
A selection of adhesive bound volumes.
At left only spine covered with bare boards. |
Simple unsupported stitch (geholländert):
Sewn using the very basic unsupported stitch described above is historical and not something I would apply to a binding that will be used. An unsupported linked stitch will work much better.
Sew textblock using an unsupported linked stitch with a single-folio endsheet hooked around the first and last signatures. This will become the pastedown. After sewing square up and glue up spine.
 |
| Single leave hooked around first signature prior to sewing. |
 |
Sewing completed, but not yet glued up. Image shows how signatures are only connected with each other at one point with two stations total.
See earlier diagrams above for more detail. |
When dry, cut thin boards proportionate in thickness to the size of the
book to the height and width of the textblock. To attach boards apply
adhesive first to the outer sheet and then put down first board, setting
it back from the spine by about 5 millimeters. Repeat with other side.
Insert fences of thin cardstock between pastedowns and text, and put in
press giving it a good hard nip.
 |
Boards attached after sewing
From left: Simple unsupported; sewn on tapes; unsupported link stitch. |
To cover, cut paper or cloth to cover spine and reaching onto board (or fully
cover spine and both boards). Work material into groove ensuring good
adhesion to spine (there should be no "hollow"). If only spine was covered, leave
remaining board bare or cover with a contrasting paper or cloth.
If a fore-edge square is left, trim this to the desired size before
covering, cover, trim so that it is no more than a centimeter, and then
turn-in. Put between boards and under weight to dry.
Trim 3 sides so as to be flush, i.e. no squares. If a fore-edge square was left, trim only at head and tail.
 |
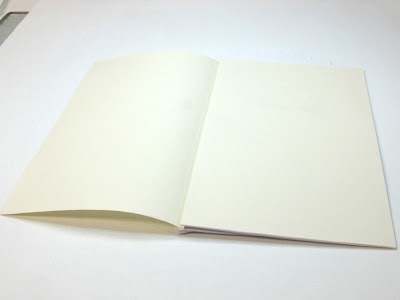
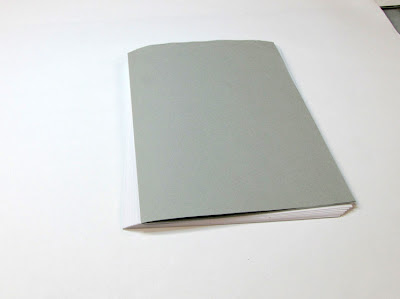
| Interior view after trimming. |
 |
| Exterior view after trimming. |
Apply label to spine of front board as/if desired.
Folio endsheet hooked around first and last signatures and sewn on tapes:
Sew textblock on tapes with using a double-folio endsheet section that is hooked around the first and last signatures.
After sewing glue up spine.
 |
| Single folio hooked around first signature prior to sewing. |
When dry, cut thin boards proportionate in thickness to the size of the
book to the height and width of the textblock. To attach boards apply
adhesive first to the outer sheet and then put down first board, setting
it back from the spine by about 5 millimeters. Repeat with other side.
Insert fences of thin cardstock between pastedowns and text, and put in
press giving it a good hard nip. [See earlier image above]
To cover, cut paper or cloth to cover spine and reaching onto board (or fully
cover spine and both boards). Work material into groove ensuring good
adhesion to spine (there should be no "hollow"). If only spine was covered, leave
remaining board bare or cover with a contrasting paper or cloth.
If a fore-edge square is left, trim this to the desired size before
covering, cover, trim so that it is no more than a centimeter, and then
turn-in. Put between boards and under weight to dry.
Trim 3 sides so as to be flush, i.e. no squares. If a fore-edge square was left, trim only at head and tail.
 |
| Interior view after trimming. Note tapes under pastedown. |
 |
| Exterior view after trimming. |
Apply label to spine of front board as/if desired.
Spine covered separately with fore-edge squares:
For these these last two books, I used a single folio endsheet tipped-onto the first and last signatures. Sewing was with an unsupported linked stitch. After sewing the textblock was glued up.
 |
| Single folio tipped-on endsheet. |
When dry, cut thin boards proportionate in thickness to the size of the
book to the height and width of the textblock. To attach boards apply
adhesive first to the outer sheet and then put down first board, setting
it back from the spine by about 5 millimeters. Repeat with other side.
Insert fences of thin cardstock between pastedowns and text, and put in
press giving it a good hard nip. [See earlier image above]
Trim at head and tail only and trim fore-edge square to desired size.
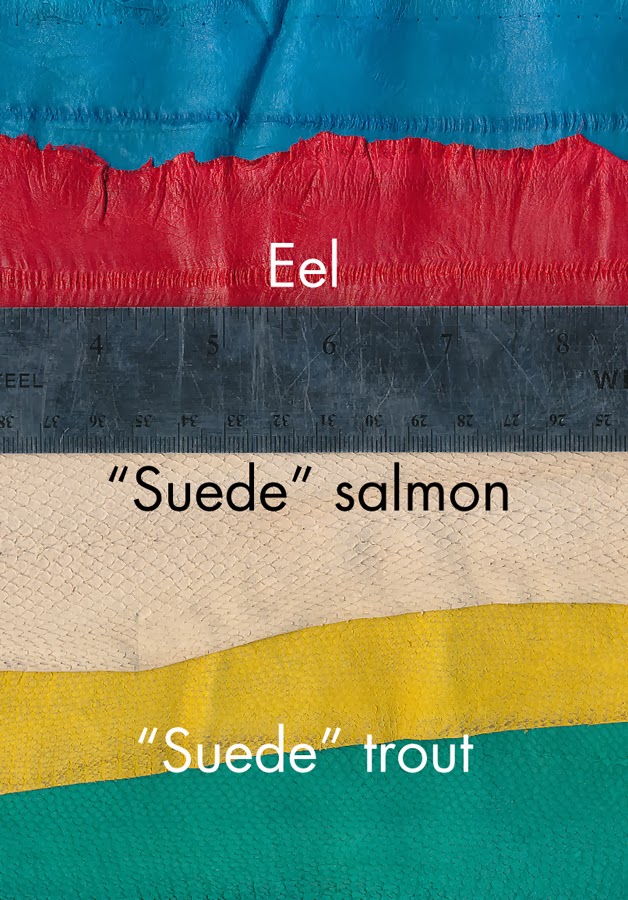
Images below show variant in which the spine with spine stiffener was applied first leaving a hollow. In addition the spine was lined with muslin to offer more support.
 |
| Spine lined and (leather) covered stiffener ready. |
 |
| Spine-stiffener attached to endsheets. |
To cover, cut paper or cloth to cover spine and reaching onto board (or fully
cover spine and both boards). Work material into groove ensuring good
adhesion to spine (there should be no "hollow"). If only spine was covered, leave
remaining board bare or cover with a contrasting paper or cloth.
 |
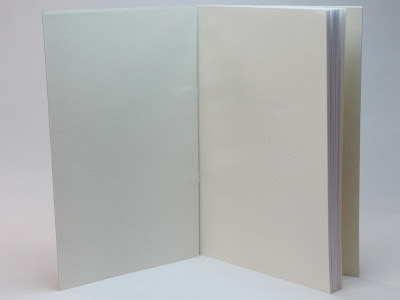
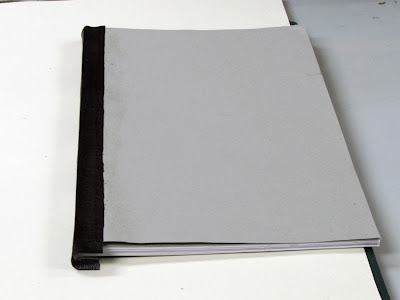
| Spine covered in cloth with paper sides. Fore-edge square left with paper turned-in around. |
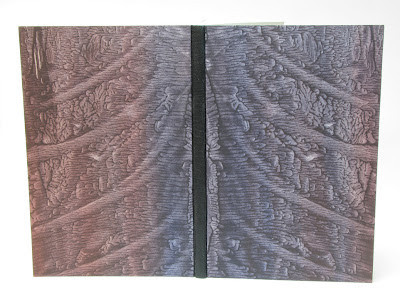 |
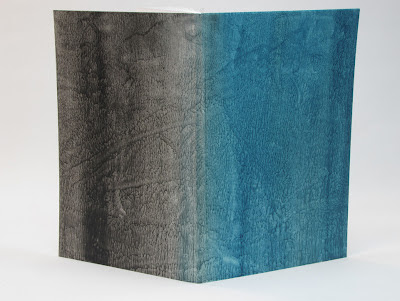
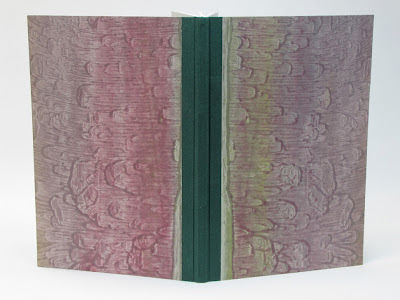
Spine covered with leather before applying boards.
Boards covered with paper turned in at spine edge, fore-edge square left with paper turned-in around. |
If a fore-edge square is left, trim this to the desired size before
covering, cover, trim so that it is no more than a centimeter, and then
turn-in. Put between boards and under weight to dry.
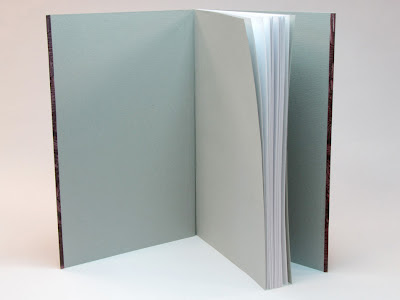 |
| Interior view showing turn-in at fore-edge. |
Trim 3 sides so as to be flush, i.e. no squares. If a fore-edge square was left, trim only at head and tail.
Apply label to spine of front board as/if desired.
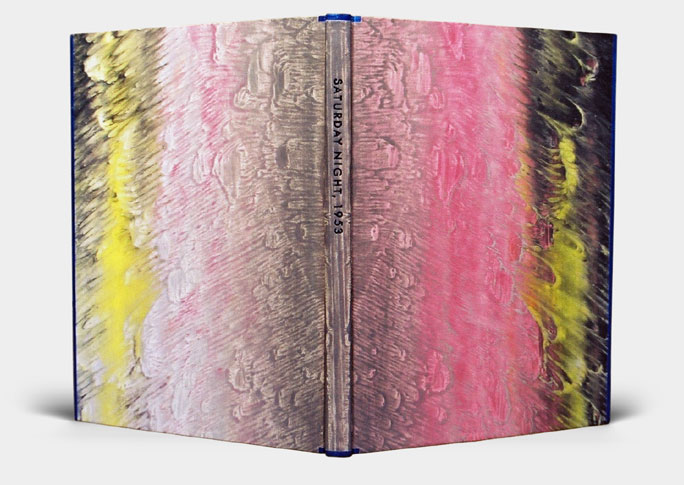
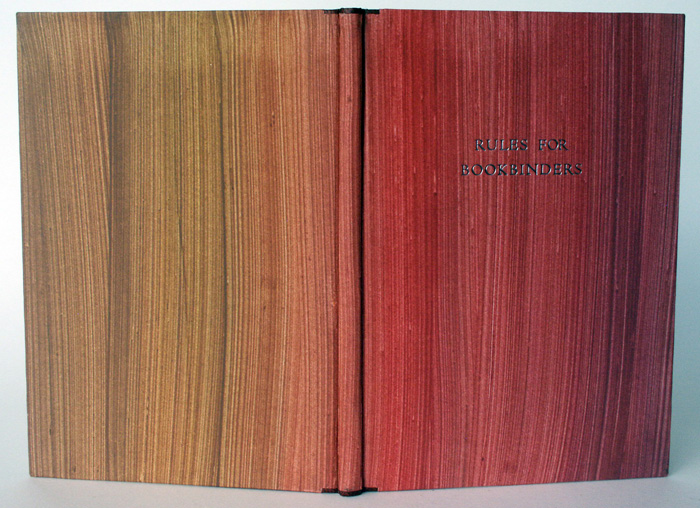
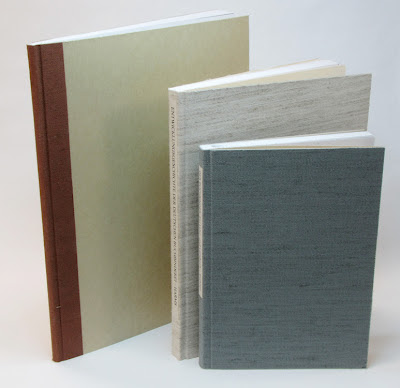
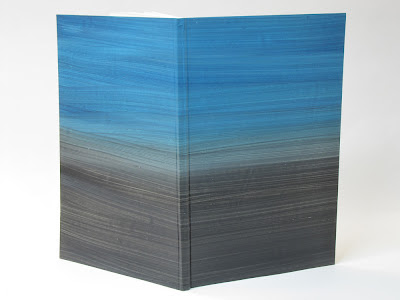
The finished books:
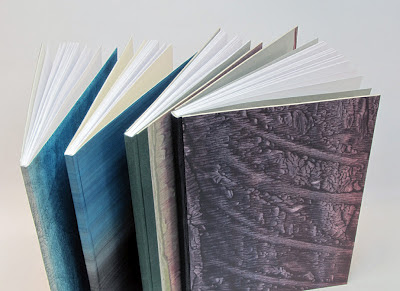 |
Note thickness of the boards. Two on the left use 20pt folder stock.
Two on right 25pt pressboard which is stiffer than the folder stock. |
|
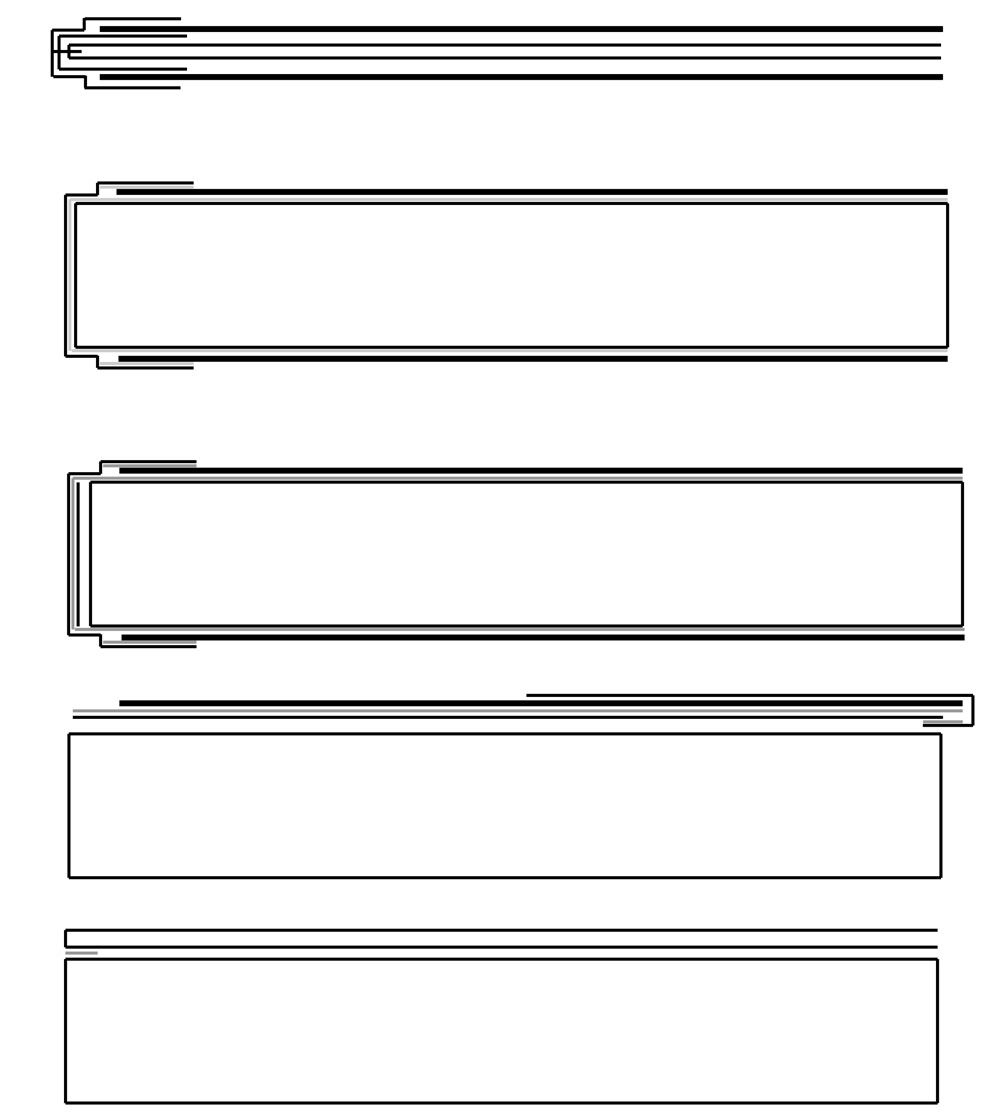
Notes:
While the images above show 4 distinct models, this structure is very modular and can be elements can be easily moved around. It can also be used for single signature items.
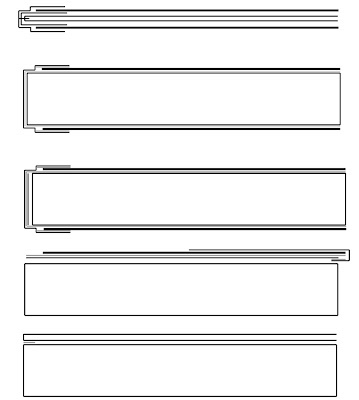 |
| From top: Single signature; multiple signature or adhesive bound; multiple signature or adhesive bound with hollow spine; board construction with fore-edge turn-in; tipped on endsheet (to whatever kind of textblock |
Have fun and experiment.
Related resources:
Books: All titles in German but most with good diagrams...
-
Adam, Paul.
Title: Die praktischen Arbeiten des Buchbinders. Wien: A. Hartleben's Verlag, 1898.
-
Henningsen, Thorwald. Handbuch für den Buchbinder. St. Gallen: Rudolf Hostettler Verlag, 1969.
-
L. Brades illustriertes Buchbinderbuch: Ein Lehr- und
Handbuch der gesamten Buchbinderei und aller in dieses Fach eingeschlagenden
Techniken. Halle: Verlag von Wilhelm Knapp, 1921.
-
Lüers, Heinrich. Das Fachwissen des Buchbinder. Stuttgart: Max Hettler Verlag 1943.
-
Moessner, Gustav. Die täglichen Buchbinderarbeiten: Eine Unterweisung
in den einfachen Arbeiten der Buchbinderei. Stuttgart: Max Hettler Verlag, 1969.
-
Rhein, Adolf. Das Buchbinderbuch. Halle (Saale): VEB Wilhelm Knapp Verlag, 1953.
-
Wiese, Fritz. Der Bucheinband: Eine Arbeitskunde mit Werkszeichnungen. Hannover: Schlüterische Verlagsanstalt und Druckerei,
1983.
-
Zahn, Gerhard. Grundwissen für Buchbinder: Schwerpunkt Einzelfertigung.Itzehoe: Verlage Beruf + Schule, 1990.
Examples of these and other variants. In German, but with lots of diagrams.